

How To Put A Cone On A Dog
- This post contains affiliate links. Read more here.
Have you ever had to dress your dog in the cone of shame? It's a notorious nickname for the Elizabethan collar used to prevent dogs from licking wounds or biting at their skin—and it perfectly captures the look of embarrassment on your dog's face when he or she has to wear one.
The cone of shame isn't fun for your dog to wear. However, when prescribed, it's necessary.

We also know this protective medical device as an e-collar, Buster collar, and recovery collar. It comes with its share of silly monikers, like pet lamp-shade, pet radar dish, and dog-saver.
Your veterinarian is likely to instruct that your dog wear a plastic e-collar as a wound heals or when recovering from surgery. The purpose of the cone of shame is to protect your dog from hurting himself or herself while on the mend.
North Town Veterinary Hospital explains that Elizabethan collars serve as a barrier that blocks your dog from biting or obsessively licking stitches, sores, hot spots, gashes, or lesions as they heal.
Do not give in to pleading puppy eyes. Keep the collar on as instructed.
Dogs instinctively lick their wounds. The Veterinary Referral Hospital of Hickory warns that licking, biting, or chewing wounds or stitches can delay the healing process. Even worse, it can lead to an infection.
Last year, I adopted my dog, Chester, from a shelter. He was a hot mess. My vet removed several embedded foxtails, which required stitches in a couple of places on his body. He also had stitches on his front paw after the removal of a cancerous growth.
Enter the cone of shame. Chester was "sentenced" to wear it for 3 to 4 weeks.
When I put the traditional plastic e-collar on Chester, he could barely lift his head from the weight of it. Every time he tried to walk, the front of the cone dug into the floor, halting him in his tracks.
Have you witnessed your dog endure a similar struggle when wearing the cone of shame?
Good news! Wearing a recovery collar doesn't have to be so awkward (and humiliating) for your pet.
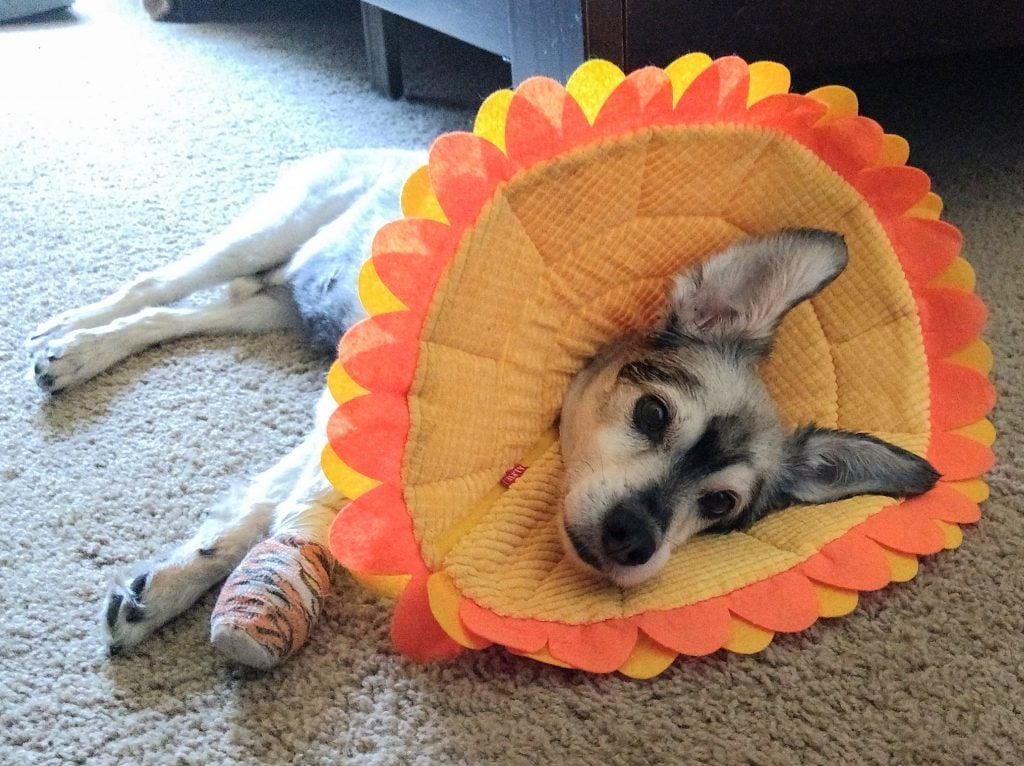
Fortunately for Chester, I found a comfortable and adorable Sunflower Dog Collar.
If you're crafty, there are do-it-yourself collars that are just as effective. They're simple to make and comfy for your dog to wear. Even better, your dog can eat, drink, and easily move around.
You can use materials from around the house to create an easy-to-wear collar for your dog that works. These are my favorites.
Thigh highs or pantyhose
My friend, Donna, put her own ingenious spin on—or perhaps literal meaning to—Elizabethan collar.
When her adorable Chihuahua, Megan Fox, had an infection on her jaw, she created a fashionable collar out of ruffle top thigh highs.
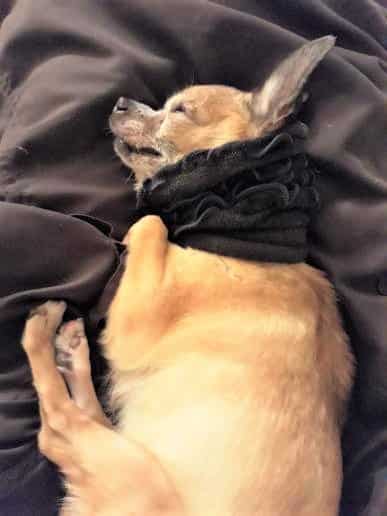
Fashionista Megan the Fox looked like she stepped right out of the Elizabethan era. This stylish collar is perfect for small dogs.
Materials and resources needed
- Ruffle top thigh-highs, stockings, pantyhose, or tights
- Scissors
Instructions
- Before you cut your thigh highs or pantyhose, check the width at the thigh area of the stocking to make sure it comfortably slips over your dog's head.
- Test the stretchiness to ensure the fit around the neck is not too tight.
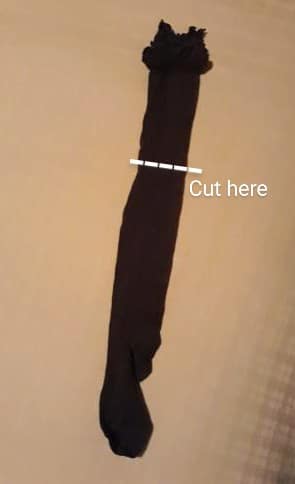
- Lay the thigh highs on a flat surface. Cut about 6 inches from the top. You end up with holes on both ends, like a neck warmer.
- For a full pair of pantyhose, also cut off at the top thigh area to separate the hosiery from the waist portion.
- Slip over your dog's head. Fold and scrunch as needed for an effective and fashionable fit.
Don't have ruffle-top thigh highs? No frills works just fine, too! Just bunch it up at the top like a scrunchie to add volume and prevent your dog from reaching sores, hot spots, or stitches.
Pool noodles
You can cut up pool noodles like these and string them through thick twine like this to create an oversized "beaded necklace". This inventive DIY recovery collar is most suitable for medium and large dogs.
Materials and resources needed
- Pool noodle
- Thick twine or dog collar
- Serrated knife
Instructions
- Measure the circumference of your dog's neck.
- Measure the twine. Cut it to the length of a collar: the circumference of your dog's neck plus two or three extra inches.
- Alternatively, you can skip the twine and use your dog's collar.
- Cut small sections of the noodle with a serrated knife.
- Loop the noodle sections through the twine or the collar.
- Add the pieces until it's full and looks like a beaded necklace.
- Tie the twine or buckle the collar.
Check out this helpful video tutorial from TopDogTips and the full step-by-step guide.
Towels
Combine a towel and duct tape to create a soft, comfy cone collar for any size of dog—small, medium, and large.
This DIY cone of shame takes two people. Your assistant gets to treat and distract your dog with a plate of peanut butter as you fit and secure a towel around his or her neck. How smart is that?
Materials and resources needed
- A human helper
- Soft, thick towel
- Duct tape
- A plate of peanut butter to keep your dog busy as you fit the collar
- Scissors (optional)
Instructions
- Pick a towel size suitable for your dog's size.
- Fold the towel lengthwise in third.
- Wrap around your dog's neck. Be careful not to get it too tight.
- Secure it with duct tape.
Follow the step-by-step tutorial by DogTrainingNation and check out their helpful video!
I hope this list of resourceful DIY cones sparked your imagination. Wishing your dog a smooth recovery!
- The Best Alternatives to the Classic 'Cone of Shame' for Dogs
- Caring for Your Dog's Stitches After Surgery: The Ultimate Guide
- 14 Easy DIY Dog Costumes You Can Whip Up at Home
How To Put A Cone On A Dog
Source: https://www.rover.com/blog/how-to-make-a-diy-cone-of-shame-for-a-comfier-happier-dog/
Posted by: crawfordwarrhatiou.blogspot.com
0 Response to "How To Put A Cone On A Dog"
Post a Comment